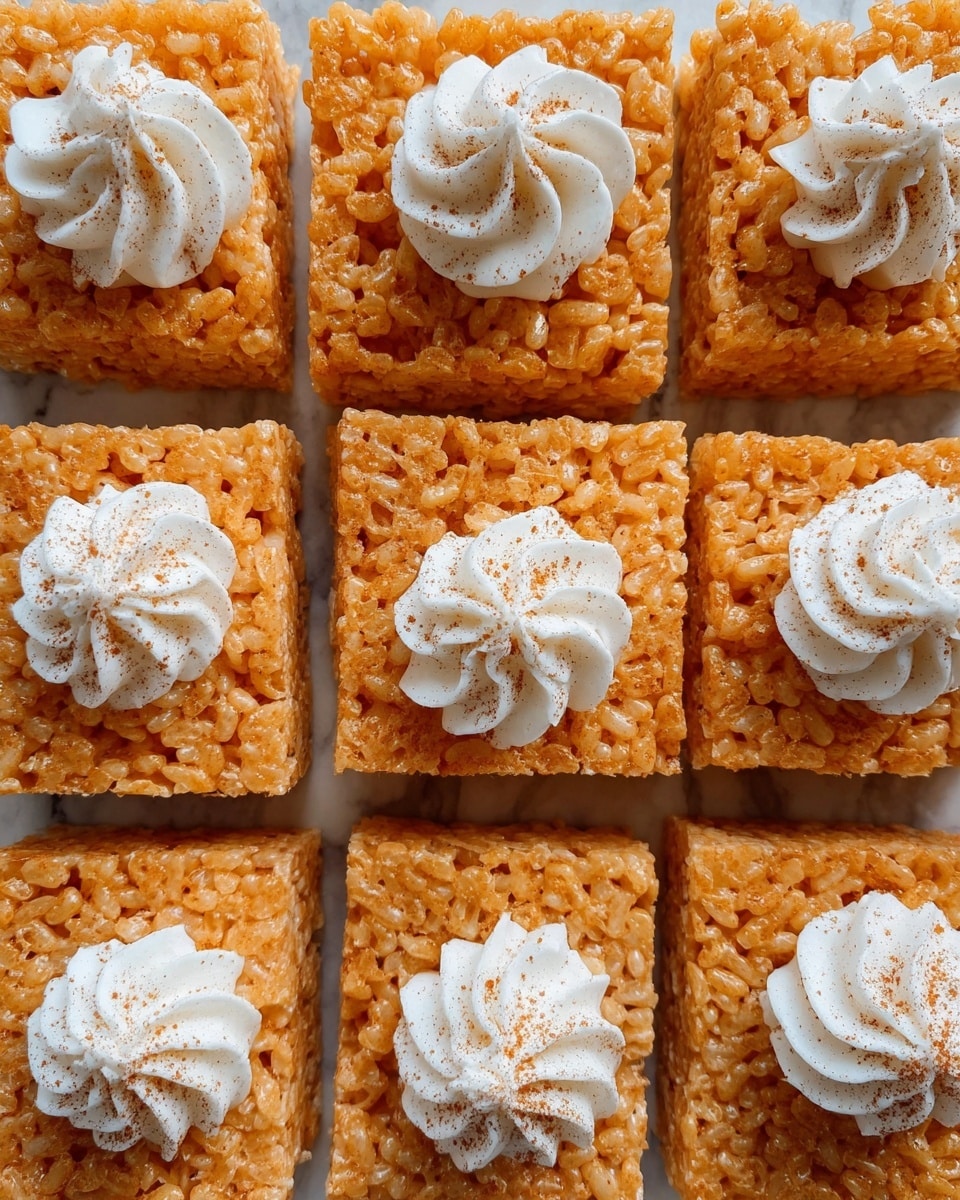
Pumpkin Pie Rice Krispie Treats Recipe
I’m so excited to share this Pumpkin Pie Rice Krispie Treats Recipe with you because it’s honestly one of my fave ways to bring that cozy, fall vibe into a classic childhood dessert. The blend of that warm pumpkin pie spice with the nostalgic crunch of Rice Krispies just hits different, especially as the weather cools down. It’s a perfect treat to whip up for a casual get-together, a festive party, or even just a cozy night in when you want something sweet and a little special.
What makes this Pumpkin Pie Rice Krispie Treats Recipe really stand out is the genius two-layer method. You get a buttery, golden “crust” that’s crispy and slightly nutty, topped with a spiced, soft filling bursting with pumpkin pie flavor. I love how easy it is, too — no complicated baking, just some stovetop magic and patience while it sets. I promise, once you try these, they’ll be your go-to seasonal snack for years.
Why This Recipe Works
- Layered Texture: The two distinct layers give crunchy and chewy textures that keep every bite interesting.
- Pumpkin Spice Flavor: Pumpkin pie spice mixed with orange food coloring adds that perfect fall look and taste without fuss.
- Simple Ingredients: You probably have everything on hand already, making it a super easy last-minute dessert.
- No Oven Needed: This treat is made entirely on the stovetop – no heating up the oven required!

Ingredients & Why They Work
Every ingredient in this Pumpkin Pie Rice Krispie Treats Recipe was chosen because it balances flavor, texture, and that classic gooeyness you expect. Plus, the butter browning for the crust adds a subtle nutty flavor that makes these treats feel extra special.

- Salted butter: Browning the butter for the crust adds a deep, toasted flavor that elevates the whole treat.
- Mini marshmallows: These melt beautifully to create that sticky, sweet base and filling.
- Rice Krispies cereal: The classic crunch that keeps these treats light and crispy.
- Pumpkin pie spice: Adds that unmistakable warm, spiced pumpkin flavor that makes this seasonal.
- Orange food coloring (optional): Just a few drops give the filling that fun, autumnal pumpkin hue.
- Whipped cream: A dollop on top ties the dessert together with a cool, creamy contrast.
Make It Your Way
One of the best parts about this Pumpkin Pie Rice Krispie Treats Recipe is how easy it is to tweak. I like adding a little extra cinnamon on top or even mixing in some crushed graham crackers into the filling for a fun crunch switch-up. Feel free to make it your own and have fun experimenting!
- Variation: I once added a swirl of cream cheese frosting between layers for a tangy surprise—it was a crowd pleaser!
- Dietary swap: Use vegan butter and marshmallow alternatives if you want to make these vegan-friendly without losing flavor.
- Spice level: Increase pumpkin pie spice for a more potent pumpkin vibe or tone it down if you prefer subtler notes.
Step-by-Step: How I Make Pumpkin Pie Rice Krispie Treats Recipe
Step 1: Buttery Browned Crust Magic
Start by greasing your 9×9 baking dish—that’s key to making sure the treats come out cleanly. Then melt the salted butter over medium heat, watching it carefully as it starts to turn golden brown and smell nutty. This step is worth the patience because the flavor it adds is incredible. As soon as you get that golden hue, toss in the marshmallows and stir until completely melted. Quickly fold in the Rice Krispies cereal, then press this mixture evenly into the dish. Let it cool while you prep the filling—this crust sets the stage for the pumpkin pie magic.
Step 2: Pumpkin-Spiced Filling Bliss
Using the same pot, melt butter over medium heat again, then stir in your pumpkin pie spice and a few drops of orange food coloring (if you’re using it). The warming spice and color transform this layer into the season’s dream treat. Add marshmallows and stir until melted, then fold in the Rice Krispies gently but thoroughly. Spread this vibrant filling over your cooled crust layer and pat down evenly. Don’t worry if it looks a bit sticky—that’s perfect. Let it fully set before slicing.
Step 3: Dollop and Serve
Once the layered Rice Krispie treats are firm, cut into 16 squares. Then, top each square with a generous dollop of whipped cream and a dash of pumpkin pie spice or cinnamon for that extra festive flair. I love serving them right away, but they also hold up well if made a few hours ahead.
Tips from My Kitchen
- Don’t Rush Browning Butter: Keep stirring constantly so it doesn’t burn—golden color and nutty aroma are your cues.
- Work Quickly with Marshmallows: Once melted, mix in Rice Krispies fast to keep that gooey texture perfect.
- Press Gently But Firmly: Flatten both layers evenly without packing them too tight; that keeps the treats light and crunchy.
- Cool Completely Before Cutting: Slicing while warm leads to sticky messes—patience pays off here.
How to Serve Pumpkin Pie Rice Krispie Treats Recipe
Garnishes
I keep it simple with a swirl of whipped cream and a generous sprinkle of pumpkin pie spice or cinnamon on top. Sometimes, I’ve crushed up some toasted pecans for a little crunch and nutty contrast — that adds a lovely textural layer and looks beautiful too.
Side Dishes
These treats shine best alongside warm drinks like spiced lattes, chai tea, or even hot apple cider. I’ve also paired them with simple vanilla bean ice cream for an indulgent dessert spread.
Creative Ways to Present
For Halloween or Thanksgiving, I’ve arranged these treats on a rustic wooden board surrounded by mini pumpkins and cinnamon sticks — it sets a cozy, festive vibe. Another fun idea is to cut them into fun shapes with cookie cutters and serve as party favors.
Make Ahead and Storage
Storing Leftovers
I store leftover Pumpkin Pie Rice Krispie Treats in an airtight container at room temperature, and they stay perfectly chewy and fresh for up to 3 days. Make sure they’re cool first to avoid condensation making them soggy.
Freezing
Freezing works too! I wrap individual squares tightly in plastic wrap and then place them in a freezer-safe bag. They freeze well for up to a month and thaw quickly at room temp when you’re ready for a sweet snack.
Reheating
If you want to warm them up a bit, a quick 8-10 second zap in the microwave revitalizes that gooey marshmallow texture without making them tough or melty. Just be cautious to not overheat!
FAQs
-
Can I use regular-sized marshmallows instead of mini for Pumpkin Pie Rice Krispie Treats Recipe?
Absolutely! If you don’t have mini marshmallows on hand, just chop regular-sized marshmallows into smaller pieces so they melt more evenly. Mini marshmallows are just convenient, but bigger ones work fine with a bit more stirring.
-
Do I have to use orange food coloring?
Nope! The orange food coloring is purely optional and just adds a festive visual touch. The pumpkin pie spice alone gives plenty of flavor, so feel free to skip the color if you prefer natural tones.
-
How long do these treats stay fresh?
Stored in an airtight container at room temperature, your Pumpkin Pie Rice Krispie Treats will stay fresh and delicious for up to three days. After that, they might start drying out, but freezing can extend their life.
-
Can I make this recipe gluten-free?
Yes! Rice Krispies cereal is typically gluten-free, but always double-check your packaging to be sure. This recipe is naturally gluten-free when you use gluten-free certified marshmallows and cereal.
Final Thoughts
This Pumpkin Pie Rice Krispie Treats Recipe has become a little ritual in my house every fall—simple, nostalgic, and filled with cozy flavors. I hope you’ll love making it as much as I do because it’s such a fun way to celebrate the season without any complicated baking. Give it a try, share it with friends, and let me know how you customize your version—I’m always on the lookout for new ideas to make it even better!
Print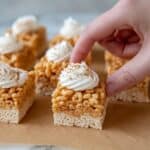
Pumpkin Pie Rice Krispie Treats Recipe
- Prep Time: 15 minutes
- Cook Time: 15 minutes
- Total Time: 1 hour 30 minutes
- Yield: 16 servings
- Category: Dessert
- Method: Stovetop
- Cuisine: American
Description
Delight in these festive Pumpkin Pie Rice Krispie Treats, featuring a browned butter crust and a spiced pumpkin filling layered with crispy cereal and mini marshmallows. Perfectly topped with whipped cream and a hint of pumpkin pie spice, these treats capture the cozy flavors of fall in every bite.
Ingredients
Crust
- 1/4 cup salted butter, browned
- 2 cups mini marshmallows
- 2 cups Rice Krispies cereal
Filling
- 1/3 cup salted butter
- 3 cups mini marshmallows
- Orange food coloring (optional)
- 1 teaspoon pumpkin pie spice, plus extra for garnish
- 4 cups Rice Krispies cereal
To Serve
- Whipped cream can, for serving
Instructions
- Prepare pan: Grease a 9×9 inch baking dish and set aside to prevent sticking.
- Make crust layer: Heat a pan over medium heat and brown 1/4 cup salted butter until golden. Add 2 cups mini marshmallows and stir until melted. Remove from heat and fold in 2 cups Rice Krispies cereal. Press the mixture evenly into the prepared pan and let it cool completely.
- Make filling layer: In the same or a clean pan, melt 1/3 cup salted butter over medium heat. Once melted, stir in 1 teaspoon pumpkin pie spice and a few drops of orange food coloring if using. Add 3 cups mini marshmallows and stir until melted. Remove from heat and gently fold in 4 cups Rice Krispies cereal. Spread this mixture evenly over the cooled crust layer and pat down to compact.
- Chill and cut: Allow the layered treats to set and cool for about 1 hour until firm enough to cut. Then slice into 16 equal squares.
- Serve with garnish: Top each square with a dollop of whipped cream and sprinkle with additional pumpkin pie spice or cinnamon before serving.
Notes
- Use salted butter as instructed to enhance the flavor balance; unsalted butter can be used but consider adding a pinch of salt.
- Allow the crust to fully cool before adding the filling to avoid mixing layers.
- Orange food coloring is optional but adds a festive pumpkin hue.
- Store treats in an airtight container at room temperature for up to 3 days.
- For a less sweet version, reduce marshmallows slightly and add extra cereal.
- Whipped cream can be substituted with dairy-free alternatives for dietary preferences.
Nutrition
- Serving Size: 1 bar
- Calories: 220 kcal
- Sugar: 18 g
- Sodium: 120 mg
- Fat: 10 g
- Saturated Fat: 6 g
- Unsaturated Fat: 3 g
- Trans Fat: 0 g
- Carbohydrates: 29 g
- Fiber: 1 g
- Protein: 2 g
- Cholesterol: 25 mg


