Pan Fried Chicken Strips Recipe
If you’re on the hunt for a quick, satisfying dinner that hits all the right notes—crispy on the outside, juicy on the inside—this Pan Fried Chicken Strips Recipe is the one I always come back to. It’s straightforward enough for a weeknight meal but impressive enough to serve friends on a cozy weekend. The seasoned flour coating gives these strips a perfect crunch without the fuss of deep frying, making it a cleaner, tastier dinner option you’ll feel good about.
What I love most about this Pan Fried Chicken Strips Recipe is how adaptable it is—whether you’re feeding picky kids or craving a hearty snack, these chicken strips won’t let you down. With just a handful of pantry staples and a little careful coating technique, you’ll have golden, flavorful strips sizzling up in less than half an hour. Give it a try, and you might find yourself reaching for these chicken strips time and again.
Why This Recipe Works
- Balanced Seasoning: The blend of garlic powder, onion powder, paprika, and kosher salt creates layers of flavor that make each bite exciting.
- Double Coating Technique: Dipping the chicken strips twice in seasoned flour and egg ensures a crispy, golden crust that stays crunchy.
- Perfect Cooking Temperature: Heating the oil to 350° ensures the chicken cooks evenly without soaking up excess grease.
- Easy Cleanup & Healthier Option: Pan frying in canola oil reduces the mess and oil absorption compared to deep frying.

Ingredients & Why They Work
Every ingredient in this Pan Fried Chicken Strips Recipe plays a role, whether it’s seasoning or texture. I always recommend fresh spices and quality chicken breasts for maximum taste and juiciness.

- Flour: Acts as the base for the crispy coating—using all-purpose flour gives a light, crunchy crust.
- Kosher Salt: Enhances all the flavors without overpowering the chicken.
- Garlic Powder: Adds a subtle, savory warmth.
- Onion Powder: Gives a background sweetness and depth.
- Freshly Ground Pepper: Offers a mild heat that wakes up the palate.
- Paprika: Brings a smoky, slightly sweet aroma and beautiful color.
- Egg: Helps the seasoned flour stick perfectly to the chicken for that signature crunch.
- Chicken Breasts: The star ingredient—lean, tender, and easy to slice into strips.
- Cooking Oil (non-GMO canola): Chosen for its neutral flavor and good smoke point, ideal for pan frying.
Make It Your Way
I love to tweak this Pan Fried Chicken Strips Recipe depending on the mood and pantry. Sometimes I add a pinch of cayenne for heat or swap paprika for smoked paprika when I’m craving a deeper smoky flavor. Don’t hesitate to make it your own—these strips are forgiving and perfect for experimenting!
- Variation: I once coated the strips with panko breadcrumbs after the second flour dip for even crunchier chicken, and it was a hit with my kids.
- Dietary Modification: For a gluten-free option, you can substitute the flour with a gluten-free all-purpose mix—the cooking time stays the same.
- Seasonal Change: Adding fresh herbs like thyme or rosemary to the flour mix lends a fresh, aromatic twist in spring or summer.
Step-by-Step: How I Make Pan Fried Chicken Strips Recipe
Step 1: Prep Your Oil and Get the Heat Right
Start by heating your cooking oil in a 12″ cast iron skillet over medium heat. I like to use a candy thermometer to get the oil temperature spot on at 350°. This little step prevents soggy strips and makes sure they’re perfectly crispy every time. Patience here pays off big in the finished texture.
Step 2: Mix Your Seasoned Flour and Beat the Egg
While the oil is warming up, whisk together your flour, kosher salt, garlic powder, onion powder, pepper, and paprika in a shallow dish. Then crack an egg into a small bowl and beat it lightly with a fork—this will be your adhesive layer for the first coating. Having everything ready before you start dipping helps keep the process smooth and fast.
Step 3: Cut, Coat, and Repeat
Slice chicken breasts into strips that feel comfortable to bite into. I usually make about eight strips. Roll each piece first in seasoned flour—not too much, just a light coat—then dip in the beaten egg, and roll again in the flour. For that extra-crispy edge I love, I even roll the strips in the flour a third time before setting them aside on a plate.
Step 4: Fry with Care
Gently place your strips in the hot oil without overcrowding—crowding causes temperature drops and less crispiness. Cook for about 4 minutes on one side, flip carefully with tongs, and cook an additional 3-4 minutes. The internal temperature should reach 160° for juicy, safe chicken. Resist the urge to poke too much to keep the coating intact.
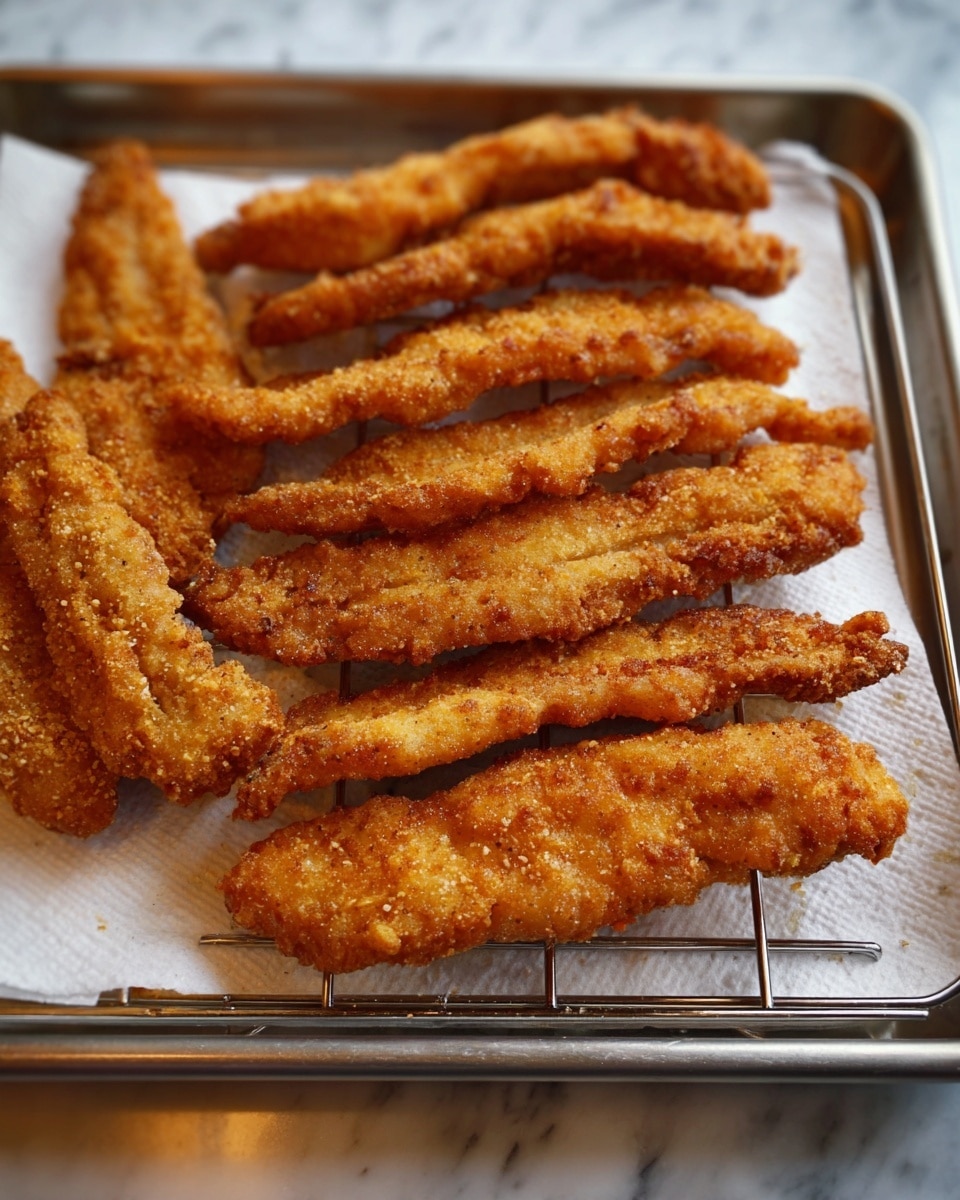
Step 5: Drain and Serve
Transfer the cooked strips to a baking rack set over paper towels to catch excess oil. This little trick keeps the crust crisp instead of soggy from sitting in oil. Serve immediately for the best texture, or keep warm in the oven on low until you’re ready to dive in.
Tips from My Kitchen
- Oil Temperature Matters: Using a candy thermometer helped me avoid greasy, undercooked strips—just right heat means perfect crunch.
- Don’t Skip the Final Flour Roll: That last dusting of seasoned flour makes the crust thicker and extra crispy, trust me on this one.
- Use a Cooling Rack: Letting the strips rest on a rack instead of towels keeps the bottom from steaming and getting soggy.
- Cut Even Strips: I learned that cutting chicken into similar-sized strips helps them cook evenly and finish right at the same time.
How to Serve Pan Fried Chicken Strips Recipe
Garnishes
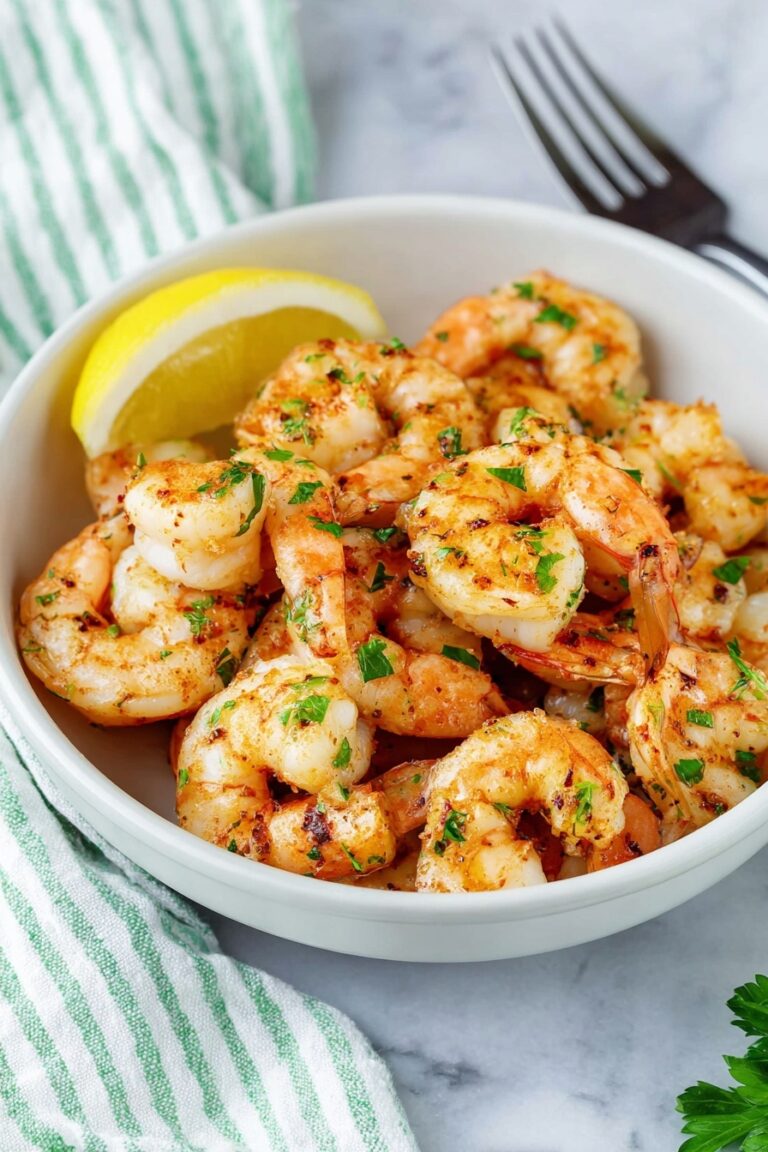
I usually add a sprinkle of chopped fresh parsley or chives right before serving—it brightens the dish and adds a fresh pop of color. A squeeze of lemon juice over the top also brings a lovely zing that cuts through the richness.
Side Dishes
Pair these chicken strips with creamy mashed potatoes or a crisp green salad for balance. Roasted veggies or baked sweet potato fries are also fantastic options if you want to keep things wholesome yet comforting.
Creative Ways to Present
For a fun weekend treat, I like serving the strips skewered with some grilled veggies, drizzled with a garlic aioli. They also make a perfect protein for wraps or tossed into a crunchy salad bowl for a casual lunch party.
Make Ahead and Storage
Storing Leftovers
Once cooled, I store leftover chicken strips in an airtight container lined with paper towels to absorb moisture. This keeps them from getting soggy in the fridge for up to 3 days, and you’ll still have that satisfying crunch when reheating.
Freezing
Freezing works well if you flash freeze the strips on a baking tray first, then transfer them to a freezer-safe bag. This prevents sticking and preserves their shape. When you want a quick meal, just reheat straight from frozen for a tasty fix.
Reheating
Reheat the strips in the oven or air fryer at 350° for about 10 minutes. This method keeps the coating crispier than microwaving, which tends to make them chewy or soggy. Keep an eye on them so they don’t overcook and become dry.
FAQs
-
Can I use chicken thighs instead of breasts for this Pan Fried Chicken Strips Recipe?
Absolutely! Chicken thighs will add more richness and stay juicy because of their higher fat content. Just keep in mind that thighs might cook a bit faster, so watch your cooking times carefully to avoid overcooking.
-
Is it necessary to double coat the chicken with flour and egg?
While a single coating can work in a pinch, double coating creates that thick, crunchy crust that makes this recipe so satisfying. It also helps seal in moisture, so don’t skip that second flour roll if you want to nail the texture.
-
What’s the best oil to use for pan frying chicken strips?
I prefer canola oil because it’s neutral in flavor and has a high smoke point, ideal for frying at 350°. Other good options include vegetable oil or peanut oil. Avoid olive oil since it has a lower smoke point and distinct taste.
-
How do I know when the chicken strips are fully cooked?
The safest way is to use a meat thermometer—the internal temp should reach 160° for this recipe. If you don’t have one, make sure the juices run clear when you cut into a strip and that the coating is golden, not dark brown.
Final Thoughts
This Pan Fried Chicken Strips Recipe has been a go-to for me not just because it’s delicious, but because it’s reliable and quick without feeling rushed. It’s perfect comfort food that doesn’t require hours or complicated prep, making it just right for busy evenings or casual get-togethers. I’m confident once you try it, you’ll find it becoming a staple in your kitchen too—so go ahead, treat yourself to these crispy, juicy strips and enjoy every bite!
Print
Pan Fried Chicken Strips Recipe
- Prep Time: 15 minutes
- Cook Time: 10 minutes
- Total Time: 25 minutes
- Yield: 4 servings
- Category: Main Course
- Method: Frying
- Cuisine: American
Description
Crispy and flavorful pan fried chicken strips coated in a seasoned flour mixture and cooked to juicy perfection. Perfect for a quick and satisfying meal or snack.
Ingredients
Dry Ingredients
- 2/3 cup flour
- 2 teaspoons kosher salt
- 1 1/2 teaspoons garlic powder
- 1 1/2 teaspoons onion powder
- 3/4 teaspoon freshly ground pepper
- 3/4 teaspoon paprika
Wet Ingredients
- 1 egg
Main Ingredients
- 2 chicken breasts
- 1 cup cooking oil (non GMO canola oil recommended)
Instructions
- Heat the oil: Heat 1 cup of cooking oil in a 12-inch cast iron skillet over medium heat until it reaches 350° Fahrenheit, using a candy thermometer to test the temperature.
- Prepare the coating: In a shallow dish, whisk together flour, kosher salt, garlic powder, onion powder, freshly ground pepper, and paprika. Crack the egg into a small bowl and beat with a fork. Cut the chicken breasts into strips.
- Coat the chicken: Roll each chicken strip in the seasoned flour until lightly coated, dip into the beaten egg, then roll again in the seasoned flour. For extra crispiness, roll each strip one more time in the flour before frying. Transfer coated strips to a plate or cutting board.
- Fry the chicken strips: Carefully place each strip into the hot oil. Fry for 4 minutes, then flip using tongs or a fork and cook for an additional 3 to 4 minutes or until the internal temperature reaches 160° Fahrenheit.
- Drain and serve: Place a cooling rack over a baking sheet lined with paper towels. Transfer the fried chicken strips to the rack to drain excess oil. Serve immediately or keep warm in the oven until ready to eat.
Notes
- Use a candy thermometer to ensure the oil stays at a consistent 350°F for perfect frying temperature.
- For more strips, increase the amount of seasoned flour and add extra eggs accordingly.
- Using a cooling rack helps the chicken strips stay crispy by allowing excess oil to drain away.
- Non GMO canola oil is preferred for its neutral flavor and high smoke point, but vegetable or peanut oil can be used as alternatives.
- Make sure not to overcrowd the pan to maintain oil temperature and ensure even cooking.
Nutrition
- Serving Size: 1 serving
- Calories: 350 kcal
- Sugar: 1 g
- Sodium: 600 mg
- Fat: 20 g
- Saturated Fat: 3.5 g
- Unsaturated Fat: 15 g
- Trans Fat: 0 g
- Carbohydrates: 20 g
- Fiber: 1 g
- Protein: 25 g
- Cholesterol: 80 mg


