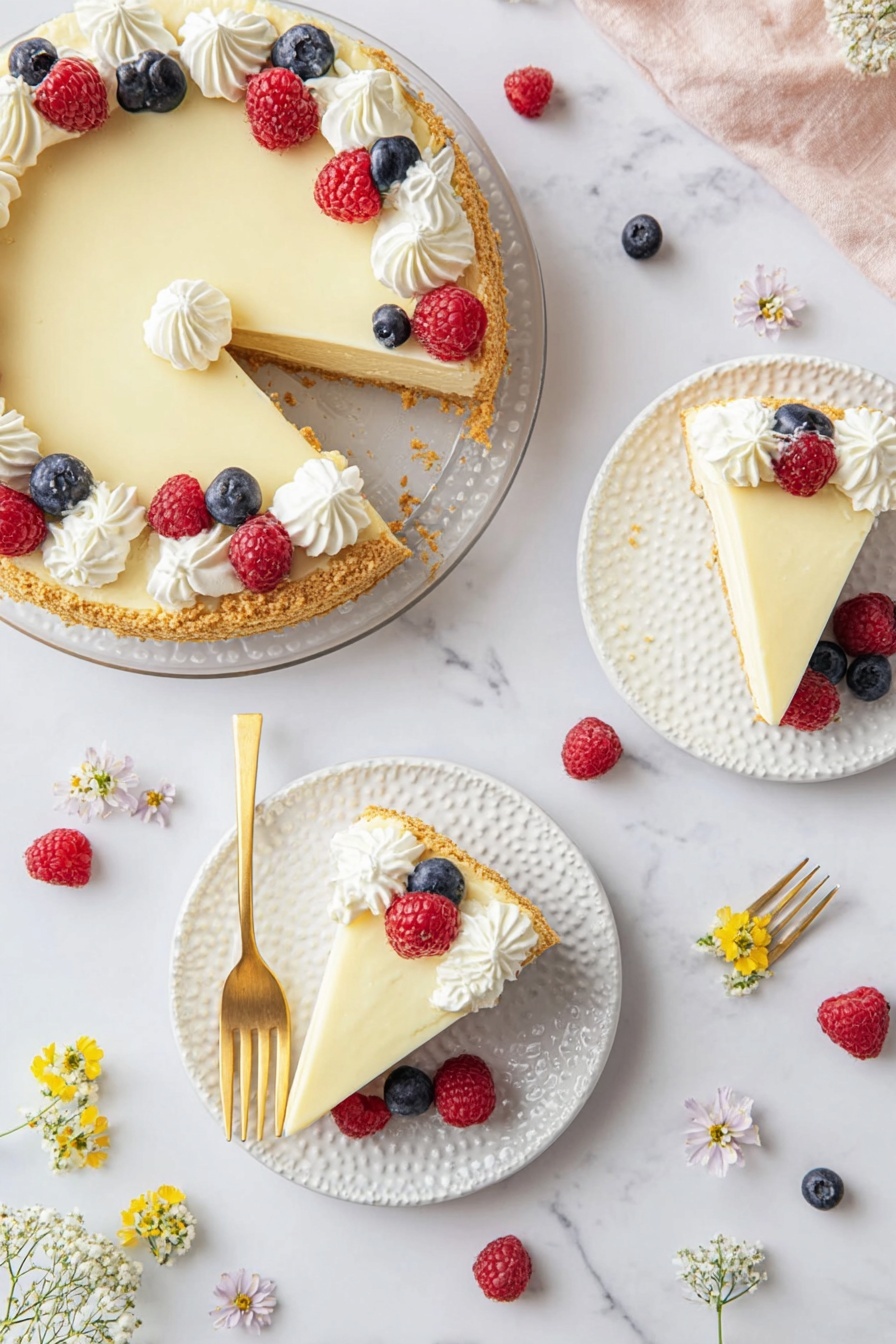
No-Bake Cheesecake with Condensed Milk Recipe
If you’re craving a dessert that’s creamy, dreamy, and effortlessly impressive, then this No-Bake Cheesecake with Condensed Milk Recipe is absolutely for you. Trust me, once you try it, you’ll be hooked—it’s one of those recipes that feels fancy but is surprisingly simple to whip up. Plus, no oven needed means it’s perfect for any season, whether you’re avoiding the heat or just want a quick sweet fix. Stick around, and I’ll walk you through how I make this crowd-pleaser every time.
Why This Recipe Works
- No Oven Needed: Perfect for hot days or last-minute desserts when you don’t feel like heating up the kitchen.
- Sweetened Condensed Milk Magic: It creates a luscious, silky filling without complicated steps or additional sugar.
- Simple Ingredients: You probably have everything on hand already, making it incredibly accessible and quick to prep.
- Versatile Base: The vanilla wafer crust adds a buttery crunch, but you can easily swap in your favorite cookies.

Ingredients & Why They Work
This no-bake cheesecake shines because each ingredient plays a starring role. The cream cheese provides that rich, tangy flavor and firm texture, while sweetened condensed milk gives you that silky sweetness without any fuss. The vanilla wafer crust isn’t just a base; it adds a satisfying crunch that balances the creamy filling perfectly. I always recommend using full-fat cream cheese for that dreamlike texture—you won’t regret it!

- Vanilla Wafers: These make the crust wonderfully crisp and slightly sweet; crushed finely, they compact beautifully.
- Butter (salted or unsalted): Helps bind the crust while adding richness; if using unsalted, a pinch of salt is a must to enhance flavor.
- Cream Cheese: Make sure to use block-style for best results. It’s the backbone of the filling, giving that classic cheesecake tang and creaminess.
- Sweetened Condensed Milk: This ingredient sweetens and smooths the filling without needing additional sugar or heavy cream.
- Lemon Juice: Adds a subtle tang that brightens up the cheesecake, balancing the sweetness perfectly.
Make It Your Way
I love how versatile this No-Bake Cheesecake with Condensed Milk Recipe is—you can easily swap out the crust or add your favorite flavors to the filling. Whether you like it classic, fruity, or with a chocolate twist, this recipe invites your creativity. Don’t be shy to experiment and make it truly yours!
- Berry Bliss: Adding fresh blueberries or raspberries on top is my personal favorite; they add a pop of color and freshness that cuts through the richness.
- Chocolate Lover’s Version: Fold in a handful of mini chocolate chips or drizzle melted dark chocolate over the top—oh, so good!
- Nutty Crunch: Sprinkle toasted almonds or crushed pistachios on the crust before pressing it in; it adds wonderful texture and flavor depth.
- Dairy-Free Adaptation: Try swapping cream cheese with a vegan cream cheese alternative and use dairy-free butter for the crust; just remember texture might vary a little.
Step-by-Step: How I Make No-Bake Cheesecake with Condensed Milk Recipe
Step 1: Crush Those Cookies Just Right
Start by placing your vanilla wafers (or any crunchy cookie you choose) in a large resealable bag. Lay it on a folded towel for stability and pound those cookies with a rolling pin until you have fine crumbs. You want this as fine as possible but avoid turning it into dust—think sandy texture. This ensures your crust packs tightly and holds together without crumbling apart.
Step 2: Melt Butter and Combine with Crumbs
I melt butter in short bursts in the microwave—20 seconds at a time—to avoid overheating and breaking it. Then, mix it thoroughly with your cookie crumbs until every crumb is coated. Press this tasty mixture into the bottom (and sides, if you like) of a 9-inch springform pan. To get an even, compact base, I often use a measuring cup or the bottom of a glass for pressing. Pop it in the fridge to chill and firm up while you prepare the filling.
Step 3: Whip Up That Silky Filling
Wipe out your mixing bowl to avoid any crust crumbs or moisture. Beat the softened cream cheese on medium speed until ultra smooth—no lumps! Then, slowly add your sweetened condensed milk, scraping the bowl sides to blend evenly. Finally, pour in the lemon juice and beat again gently until the filling thickens a bit and becomes glossy. Be patient here; a smooth filling is key to a great cheesecake.
Step 4: Assemble and Chill
Pour that luscious filling over your chilled crust and smooth out the top with an offset spatula for a clean finish. Cover the pan tightly with plastic wrap—this helps prevent any refrigerator odors from creeping in. Then, resist the temptation and let it chill for at least 5 to 6 hours, preferably overnight. This wait time is crucial because it allows the cheesecake to set into that perfect sliceable texture.
Step 5: Decorate and Serve
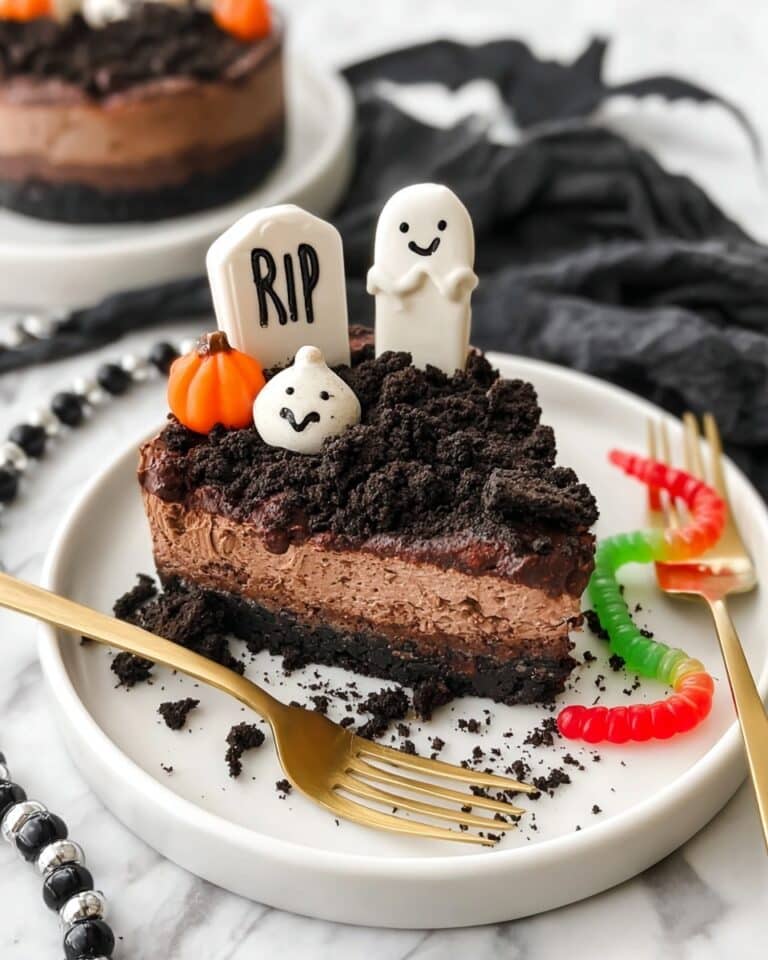
Once set, feel free to dress it up as you like—fresh berries, chocolate drizzle, whipped cream swirls, or even edible flowers for a fancy touch. Then, just release the springform, slice up, and enjoy the creamy bliss. I find the thinner the slice, the more delightful it tastes, plus everyone gets a bit of the crust and filling in every bite!
Tips from My Kitchen
- Softening Cream Cheese: Take your cream cheese out of the fridge about an hour before making the filling to avoid lumps and ensure smoothness.
- Chill Time is Key: Don’t skip the 5+ hours chilling; I tried serving it too soon once, and it was way too soft to cut cleanly.
- Pressing the Crust: Use a measuring cup with a flat bottom to press the crust firmly—it helps it hold together and feel more like a traditional cheesecake base.
- Mixing Gently: When adding lemon juice, beat just until combined to prevent the mixture from breaking or curdling.
How to Serve No-Bake Cheesecake with Condensed Milk Recipe
Garnishes
My go-to garnishes are fresh berries—strawberries, blueberries, raspberries—because their bright tartness beautifully cuts through the richness. Sometimes I swirl on a little whipped cream or a drizzle of melted chocolate for that elegant look and extra indulgence. Sprinkling crushed nuts on top gives a delightful crunch and makes each slice feel special.
Side Dishes
This cheesecake pairs incredibly well with a simple fruit salad or a light mint tea to refresh your palate. If I’m serving it after a hearty meal, I like to keep sides minimal—maybe just a scoop of sorbet or homemade berry compote to balance the creamy texture.
Creative Ways to Present
For parties, I like to make mini versions in individual cups or jars for a cute, no-fuss presentation. Another fun approach is layering with crushed cookies and my favorite jam to create a trifle-style cheesecake. It’s always a showstopper and super easy to customize with seasonal fruits or festive sprinkles.
Make Ahead and Storage
Storing Leftovers
I store leftover cheesecake covered with plastic wrap or an airtight container in the fridge, and it keeps beautifully for up to 4 days. The texture stays silky, and the flavors even deepen overnight—so you might just find it tastes better the next day!
Freezing
Freezing this cheesecake works surprisingly well. I slice it before freezing so I can grab individual pieces. Wrap each slice tightly in plastic wrap, then foil, and store in an airtight container. When ready, thaw overnight in the fridge. Texture stays creamy, though a little softer than fresh—still delicious!
Reheating
Since it’s a chilled dessert, reheating typically isn’t needed or recommended, but if you want a softer texture, leave it at room temperature for about 20 minutes before serving. This helps bring out the flavors without losing that signature creaminess.
FAQs
-
Can I use a different crust for this No-Bake Cheesecake with Condensed Milk Recipe?
Absolutely! While vanilla wafers create a great base, you can use graham crackers, digestive biscuits, Oreos, or even shortbread cookies. Just make sure to crush them finely and add a little sugar if they aren’t sweetened enough on their own. This adaptability makes it super easy to tailor to your taste or pantry.
-
What kind of cream cheese should I use for the best results?
You want to go with dense block-style cream cheese—not the spreadable kind from tubs. The block cream cheese has less moisture and a firmer texture, which helps your cheesecake set properly. If you can’t find block-style, you can drain excess liquid from spreadable cream cheese using a cheesecloth, but the texture might differ slightly.
-
How long does the cheesecake need to chill?
It needs at least 5 to 6 hours in the fridge to set firmly—a full overnight chill is even better. This patience pays off with slices that hold their shape beautifully without being too soft or runny.
-
Can I make this cheesecake ahead of time for parties?
Definitely! This cheesecake is a perfect make-ahead dessert because it actually tastes better after resting in the fridge. Just assemble it the night before, chill it, and garnish right before serving. It’s a big time-saver and guarantees relaxed entertaining.
Final Thoughts
I still remember the first time I tried this No-Bake Cheesecake with Condensed Milk Recipe and how amazed I was at how easy it was to get that classic cheesecake flavor without turning on the oven. It’s one of those recipes that feels indulgent but comes together in no time, perfect for impromptu gatherings or a cozy treat just for you. Give it a go—I’m betting it’ll become one of your favorite desserts to make, too. And hey, feel free to get creative and tweak it; the best part is making it your own!
Print
No-Bake Cheesecake with Condensed Milk Recipe
- Prep Time: 45 minutes
- Cook Time: 0 minutes
- Total Time: 6 hours 45 minutes
- Yield: 10 servings
- Category: Dessert
- Method: No-Cook
- Cuisine: American
Description
This no-bake cheesecake recipe features a crunchy vanilla wafer crust and a creamy, smooth filling made with full-fat cream cheese and sweetened condensed milk. It’s easy to prepare and requires no baking, making it perfect for a refreshing dessert that sets in the refrigerator.
Ingredients
Crust
- 2 1/4 cups vanilla wafers crumbs (300 g / 10.6 oz)
- 10 tbsp salted butter, melted (140 g / 4.9 oz) (or unsalted butter + 1/4 tsp salt)
Filling
- 16 oz full-fat cream cheese, softened (450 g) (2 x 8-oz packs)
- 1 can sweetened condensed milk (14 oz / 400 g)
- 2 tbsp lemon juice
Instructions
- Crush cookies: Place the vanilla wafers (or substitute with Graham crackers/digestive biscuits) in a large resealable plastic bag. Lay the bag on a folded kitchen towel and crush the cookies using a rolling pin until finely ground. Alternatively, use a food processor or blender.
- Melt butter: Place the butter in a large mixing bowl, cover with plastic wrap, and melt it in the microwave on medium power in 20-second intervals, stirring after each until fully melted.
- Make the crust: Add the crushed cookie crumbs to the melted butter and mix thoroughly. Press the mixture firmly into the bottom and up the sides of a 9-inch (23 cm) springform pan, using a measuring cup or similar tool to compact it evenly. Refrigerate the crust to chill and set.
- Mix cheesecake filling: Wipe the mixing bowl dry. Add softened cream cheese and beat with an electric mixer at medium speed until smooth. Gradually add the sweetened condensed milk, mixing continuously and scraping the bowl sides to combine. Beat in the lemon juice, which will help thicken the mixture.
- Assemble cheesecake: Pour the filling over the chilled crust and smooth the surface with an offset spatula if desired.
- Refrigerate: Cover the springform pan with plastic wrap and refrigerate for about 5 to 6 hours or overnight until firm.
- Decorate (optional): Once set, garnish the cheesecake with toppings such as chocolate drizzle, sprinkles, whipped cream swirls, or fresh fruit and berries.
- Serve: Keep the cheesecake chilled until ready to serve. Remove the springform ring and cut into slices. Enjoy your creamy no-bake cheesecake!
Notes
- You can substitute vanilla wafers with Graham crackers, digestive biscuits, shortbread cookies, or Oreos for the crust.
- If using Graham crackers or digestive biscuits, add 3 tablespoons of granulated sugar to the crust for sweetness.
- Use dense block-style cream cheese (not spreadable whipped) for the filling to ensure proper firmness.
- If you live outside North America where block cream cheese is hard to find, buy 600 g full-fat Philadelphia cream cheese and squeeze out excess liquid using a cheesecloth or kitchen towel to reduce it to 450 g.
- Press the crust firmly for a stable base and chill it well before adding the filling to prevent sogginess.
- Allow sufficient chilling time to let the cheesecake set firmly for clean slices.
Nutrition
- Serving Size: 1 slice
- Calories: 350 kcal
- Sugar: 25 g
- Sodium: 220 mg
- Fat: 23 g
- Saturated Fat: 14 g
- Unsaturated Fat: 8 g
- Trans Fat: 0 g
- Carbohydrates: 30 g
- Fiber: 1 g
- Protein: 5 g
- Cholesterol: 70 mg


