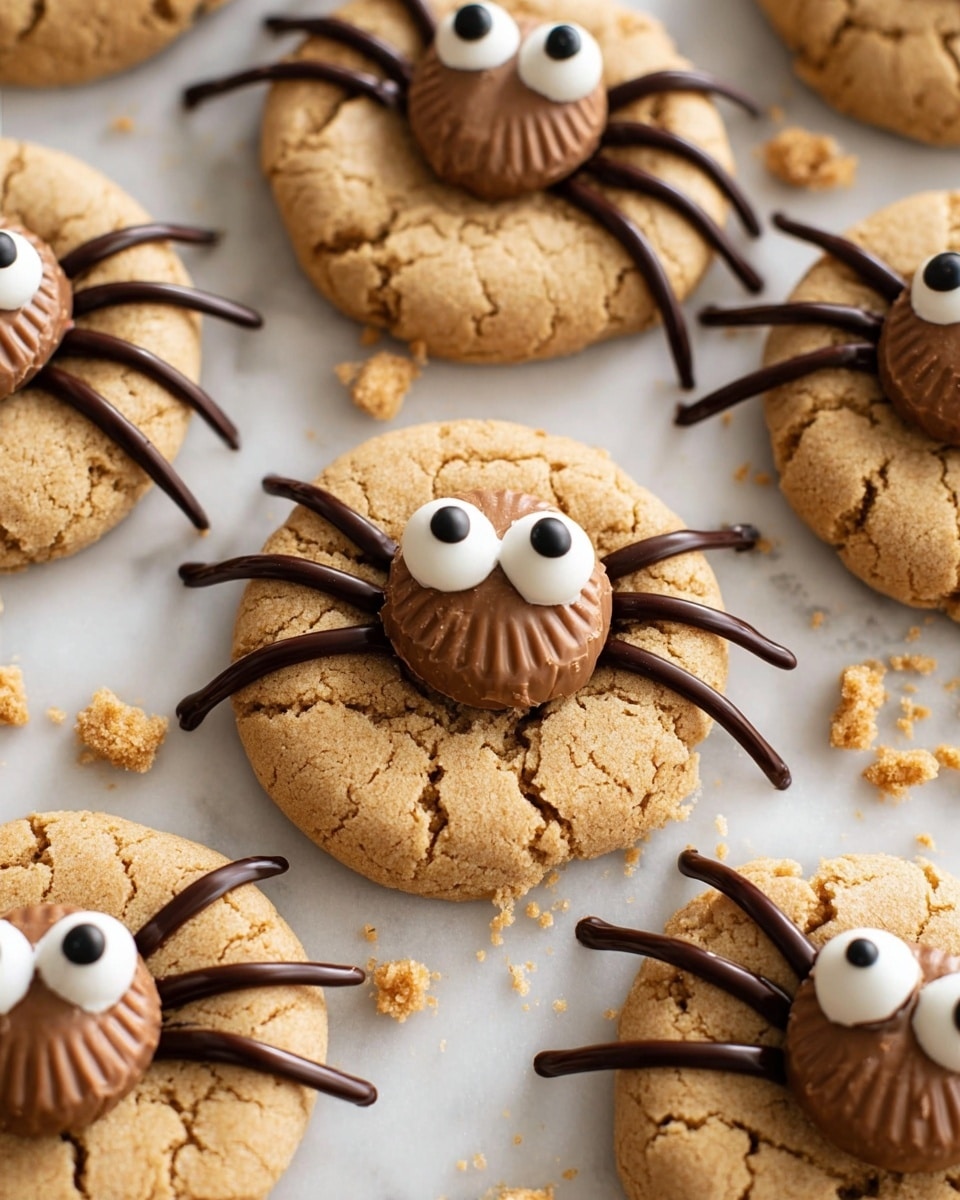
Halloween Inspired Peanut Butter Blossom Spider Cookies Recipe
If you’re looking for a fun, festive treat that’ll totally steal the Halloween spotlight, you’ve got to try this Halloween Inspired Peanut Butter Blossom Spider Cookies Recipe. These aren’t your average sugar cookies — with creamy peanut butter, a melty Reese’s cup center, and adorable little candy eyes, they bring a playful spooky vibe and an irresistible flavor combo to the party. Plus, they’re surprisingly easy to make, so whether it’s a last-minute party or a weekend baking session, you’re covered. Trust me, once you make these, you’ll want to whip up a batch every October!
Why This Recipe Works
- Perfect Texture Balance: Creamy peanut butter and softened butter create cookies that are soft yet hold together beautifully for decorating.
- Flavor Harmony: The combo of peanut butter, sugar, and vanilla pairs perfectly with the mini Reese’s cups for that iconic chocolate-peanut butter taste.
- Fun & Festive Look: Candy eyes and piped chocolate “spider legs” turn ordinary cookies into Halloween conversation starters.
- Simple Yet Impressive: These cookies look like you spent hours decorating but come together quickly with minimal fuss.

Ingredients & Why They Work
The ingredients for this Halloween Inspired Peanut Butter Blossom Spider Cookies Recipe are straightforward staples but come together to create magic. Each element plays a part, so I always recommend using the best quality peanut butter and fresh eggs you can find — it definitely shows.

- Unsalted butter: Softened butter adds moisture and richness, helping the cookie base stay tender without being greasy.
- Creamy peanut butter: Smooth peanut butter blends seamlessly into the dough, giving that signature flavor and softness.
- Granulated sugar: Provides sweetness and helps create a slight crispness on the outside after baking.
- Eggs: Bind all the ingredients and give structure, while keeping the cookies moist.
- Vanilla extract: Adds warmth and depth, complementing the peanut butter beautifully.
- All-purpose flour: The foundation of the cookie dough, handling a perfect balance of chewiness and softness.
- Baking soda: Leavens the cookies lightly so they rise nicely but don’t spread too thin.
- Salt: Enhances flavor and balances the sweetness.
- Miniature Reese’s Peanut Butter Cups: The star garnish and surprise center, blending chocolate and peanut butter in the cutest way.
- Candy eyes: Bring the spider design to life — cute and creepy all at once!
- Semi-sweet chocolate chips (melted): Used to pipe spider legs and help attach candy eyes when needed.
Make It Your Way
One of the joys of this Halloween Inspired Peanut Butter Blossom Spider Cookies Recipe is how easy it is to make it your own. I like to switch up small decorations or try different peanut butter cup brands depending on what I have on hand. Feel free to add your personal twist!
- Variation: I sometimes swap mini Reese’s cups with white chocolate peanut butter cups for a fun color twist, which my kids love.
- Dietary Modifications: For a gluten-free version, I use a cup-for-cup gluten-free baking flour blend — it works really well here.
- Seasonal Touch: Adding a pinch of cinnamon or pumpkin pie spice to the dough makes these feel extra autumnal and cozy.
Step-by-Step: How I Make Halloween Inspired Peanut Butter Blossom Spider Cookies Recipe
Step 1: Cream the butter and sugar until light and fluffy
To kick off this Halloween Inspired Peanut Butter Blossom Spider Cookies Recipe, I start by creaming the softened unsalted butter with the granulated sugar in a large bowl. This takes about 4-5 minutes on medium speed with a paddle attachment if you have a stand mixer. You want the mixture to look pale and fluffy — that’s how you know you’ve incorporated enough air for a tender cookie.
Step 2: Add peanut butter, eggs, and vanilla
Next, add in the creamy peanut butter and mix for another couple of minutes until smooth and combined. Then, crack in your room temperature eggs one at a time, adding the vanilla extract last. Mix everything together just until combined — don’t overdo it here or the cookies might get tough.
Step 3: Mix in dry ingredients and chill the dough
Now, sift in the all-purpose flour, baking soda, and salt. Mix gently on low speed until the dough just comes together. Once your dough is ready, cover it up and chill it in the fridge for about 25-30 minutes. Chilling helps control spread so your cookies hold their shape.
Step 4: Scoop, roll, and sugar-coat the dough balls
Preheat your oven to 350°F (175°C). Using a 1-ounce scoop or spoon, portion out the dough and roll each into a smooth ball with your palms. Then, roll each ball in the extra granulated sugar — this adds a nice little sparkle and texture once baked.
Step 5: Bake and cool
Arrange the sugar-coated dough balls 2-3 inches apart on a parchment-lined baking sheet. Bake for about 9-11 minutes until they turn golden but still look soft in the center — they’ll firm up as they cool. Let them rest on the sheet for 5 minutes before transferring to a cooling rack.
Step 6: Add the Reese’s cups and candy eyes
Once the cookies have cooled for a bit (about 5 minutes), gently press one miniature Reese’s Peanut Butter Cup into the center of each cookie. The warmth makes the candy slightly melty, so it sticks well. Then, press two candy eyes onto each cup. If they don’t stick, I use a dab of melted chocolate as glue.
Step 7: Pipe the spider legs with melted chocolate
Fill a piping bag or a plastic sandwich bag with the melted semi-sweet chocolate. Snip a tiny corner and carefully pipe spider legs radiating from each cookie. If piping feels intimidating, you can also use a toothpick dipped in melted chocolate or even black licorice strands! Let them cool completely before serving.
Tips from My Kitchen
- Chill Your Dough: Don’t skip chilling — it makes the dough easier to handle and helps keep your cookies from spreading too much.
- Freeze Reese’s Cups Beforehand: I like popping the mini Reese’s in the freezer for 5-10 minutes before adding them to cookies to keep them from melting too fast.
- Use Piping Bag for Legs: Using a piping bag with a tiny tip makes drawing spider legs neat and quick compared to a toothpick or icing tube.
- Wait Before Adding Toppings: Let cookies cool a few minutes first so your candy eyes and Reese’s cups don’t slide off or get too melty.
How to Serve Halloween Inspired Peanut Butter Blossom Spider Cookies Recipe
Garnishes
I usually stick to candy eyes and a simple chocolate piped design for the spider legs — it’s the perfect combo of creepy and cute. If you want to dress them up more, sprinkle edible glitter or dust the edges with a little cocoa powder for an extra spooky effect that’s still tasty.
Side Dishes
These cookies shine as a standalone treat but also pair surprisingly well with a cold glass of milk or a cup of warm spiced cider. For a party, I like serving them alongside a platter of fruit skewers or pumpkin-shaped cheese bites for a fun Halloween-themed snack table.
Creative Ways to Present
I’ve had a blast arranging these spidery cookies on black lace doilies with fake spider web decorations around. Another fun idea is putting them in clear cellophane bags tied with orange and black ribbons — perfect as spooky party favors or classroom treats.
Make Ahead and Storage
Storing Leftovers
I store leftover Halloween Inspired Peanut Butter Blossom Spider Cookies in an airtight container at room temperature for up to 3-4 days. They keep their soft texture and the peanut butter cups stay perfectly gooey without getting too hard or sticky.
Freezing
If I need to prep in advance, I freeze the baked cookies without the Reese’s cups and decoration. When ready to serve, I thaw them, then add the peanut butter cups, eyes, and spider legs fresh for best results. This way, nothing gets soggy or melts too much in the freezer.
Reheating
To warm up leftovers, I pop them in the microwave for just 10-15 seconds — enough to soften up but not melt the candy. This refreshes the cookie’s softness and melts the peanut butter cups slightly, making them taste freshly baked.
FAQs
-
Can I use chunky peanut butter for this recipe?
You can, but I recommend creamy for a smoother dough and a more uniform cookie texture. Chunky peanut butter will add extra crunch, which some might love, but it might affect how evenly the cookies bake.
-
What if I don’t have candy eyes?
No worries! You can draw eyes with a small dot of melted chocolate or use edible markers if you want to get creative. Small chocolate chips or chopped nuts also work in a pinch.
-
Can these cookies be made vegan?
With some ingredient swaps like vegan butter, flax eggs, and dairy-free chocolate, you can definitely make a vegan version. Just be sure to choose vegan-friendly peanut butter cups and candy eyes.
-
Is there a way to make the spider legs without melted chocolate?
Absolutely! Black licorice strings or thin strips of fruit leather make fun, edible spider legs without the need for chocolate piping. You can also use black gel icing tubes if you prefer.
Final Thoughts
Honestly, this Halloween Inspired Peanut Butter Blossom Spider Cookies Recipe has become a seasonal favorite in my kitchen. I love how it mixes simple, pantry-friendly ingredients with a creative twist that kids and adults both adore. Baking these brings out my playful side and makes me smile every time I see those cute spider faces. If you’re looking for a festive, crowd-pleasing treat that’s as fun to make as it is to eat, I can’t recommend these enough. Grab your apron and get ready to impress!
Print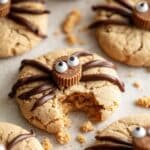
Halloween Inspired Peanut Butter Blossom Spider Cookies Recipe
- Prep Time: 20 minutes
- Cook Time: 11 minutes
- Total Time: 1 hour
- Yield: 24 cookies
- Category: Dessert
- Method: Baking
- Cuisine: American
- Diet: Vegetarian
Description
Halloween Inspired Peanut Butter Blossom Spider Cookies combine soft peanut butter dough with miniature Reese’s cups and candy eyes, decorated with melted chocolate spider legs for a festive treat perfect for Halloween celebrations.
Ingredients
Cookie Dough
- 1/2 cup Unsalted butter, softened
- 1 cup Creamy peanut butter
- 1 1/2 cups Granulated sugar + 2 tbsp for rolling
- 2 Eggs, room temperature
- 1 tbsp Vanilla Extract
- 2 1/2 cups All-purpose Flour
- 1 tsp Baking Soda
- 1 tsp Salt
Decorations
- 24 Miniature Reese’s Peanut Butter Cups
- Candy eyes
- 1 oz. Semi-sweet chocolate chips, melted
Instructions
- Cream butter and sugar: In a large mixing bowl fitted with a paddle attachment, cream together butter and sugar for 4-5 minutes until light and fluffy.
- Add peanut butter and mix: Incorporate the peanut butter into the mixture and mix for another 1-2 minutes.
- Add eggs and vanilla: Beat in the eggs and vanilla extract until well combined.
- Combine dry ingredients: Add the flour, baking soda, and salt to the wet ingredients and mix until fully incorporated.
- Chill the dough: Cover the dough and chill for 30 minutes to firm up.
- Preheat oven and prepare cookies: Preheat oven to 350 degrees F. Using a 1 oz. scoop or measuring spoon, portion dough and roll into smooth balls, then roll each ball in 2 tablespoons of granulated sugar.
- Bake the cookies: Place the sugar-coated dough balls on a parchment-lined sheet pan spaced 2-3 inches apart and bake for 11 minutes until golden brown but still soft.
- Cool cookies slightly: Let cookies sit for a few minutes on the pan after baking, then transfer to a wire rack to cool completely for about 5 minutes.
- Add Reese’s and eyes: Press a miniature Reese’s Peanut Butter Cup into the center of each warm cookie, then press two candy eyes onto each peanut butter cup. The warmth helps candy eyes stick naturally.
- Pipe spider legs: Place melted chocolate in a piping bag or plastic sandwich bag, snip a small corner, and pipe spider legs around the Reese’s cup on each cookie.
- Set and store: Allow the chocolate to set and cool completely. Store leftover cookies in an airtight container at room temperature for 3-4 days.
Notes
- Allow the cookies to cool for about 5 minutes after baking before adding the Reese’s cups to prevent them from melting too much.
- Chilling the Reese’s cups in the freezer for a few minutes before placing them on the cookies helps reduce melting.
- The candy eyes should stick onto the Reese’s cup due to the warmth of the cookie; if not, use a small dot of melted chocolate to adhere them.
- Spider legs can also be drawn using a toothpick dipped in melted chocolate, black Twizzlers, or gel icing as an alternative to piping.
- Use parchment paper on the baking sheet to prevent sticking and for easier cleanup.
Nutrition
- Serving Size: 1 cookie
- Calories: 180 kcal
- Sugar: 13 g
- Sodium: 140 mg
- Fat: 11 g
- Saturated Fat: 4 g
- Unsaturated Fat: 6 g
- Trans Fat: 0 g
- Carbohydrates: 16 g
- Fiber: 1 g
- Protein: 5 g
- Cholesterol: 25 mg


