
Cauldron Cookie Cups Recipe
If you’re anything like me and love a whimsical treat that brings a little magic to your dessert table, you’re going to adore my Cauldron Cookie Cups Recipe. These little cookie cups are not just adorable—they’re filled with a luscious green buttercream frosting and topped with spooky decorations that make them perfect for Halloween or any fun gathering. Stick around, because I’m sharing all the tips and tricks you need to nail this recipe and wow your guests (or yourself) with some seriously sweet sorcery!
Why This Recipe Works
- Simple base dough: Using a Devil’s Food cake mix as the base gives the cookie cups a rich chocolate flavor with minimal effort.
- Perfect shape: Baking in mini muffin pans and pressing an indentation while warm guarantees the perfect “cauldron” cup shape.
- Creamy buttercream: The homemade green buttercream frosting is smooth and pipeable, making the filling look like bubbling potion.
- Festive finishing touches: Fun decorations like candy eyeballs and pretzel “stir sticks” elevate these from cute to showstopper treats.

Ingredients & Why They Work
The magic of this Cauldron Cookie Cups Recipe lies in how simple, everyday ingredients combine to create an impressive treat. I love that you can grab a cake mix and turn it into something whimsical and delicious with just a few extras. Here’s the lowdown on what you’ll need and why each ingredient shines.
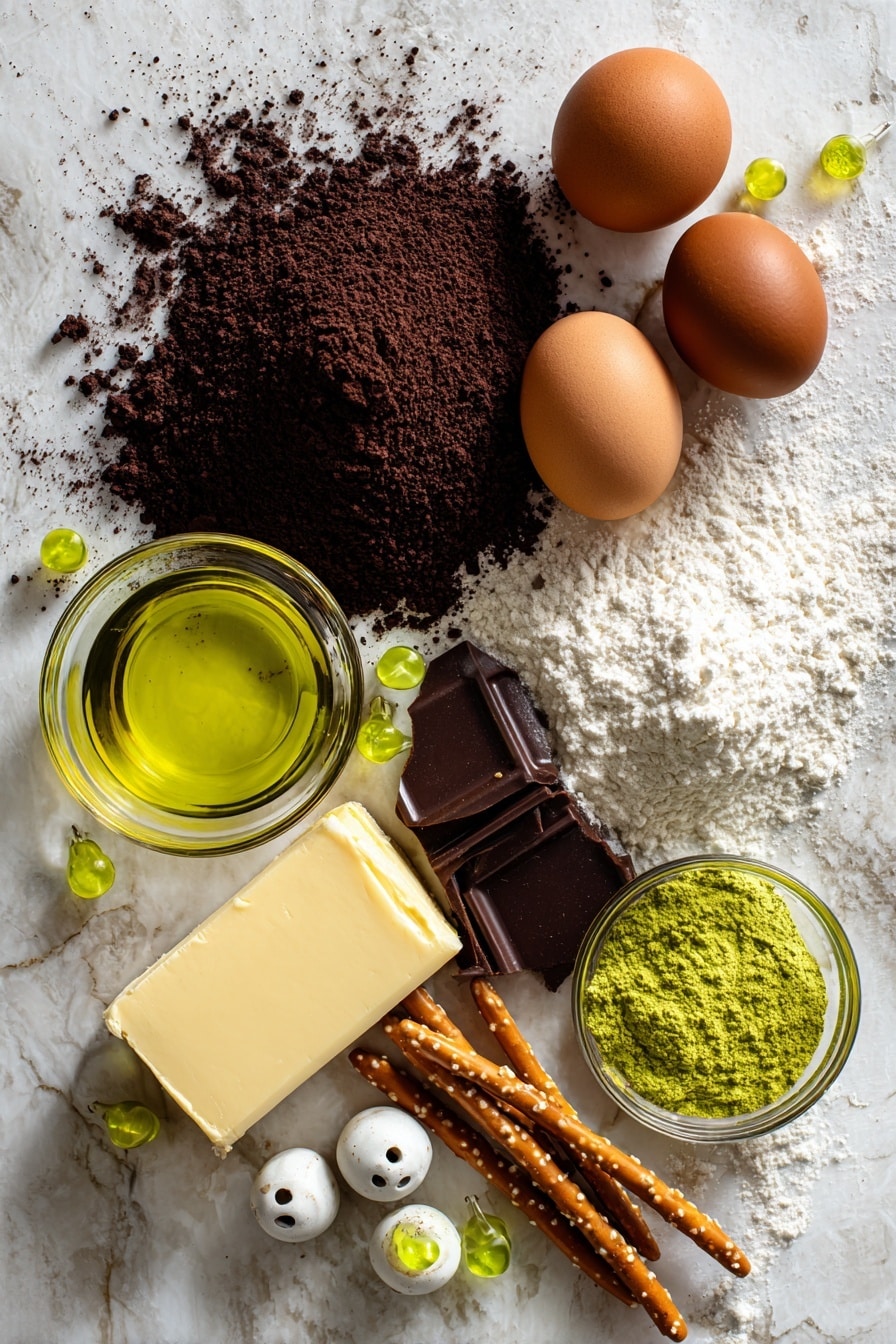
- Devil’s Food cake mix: This gives your cookies a deep chocolate base packed with rich flavor—and it’s super forgiving if you’re new to baking cookies from cake mix.
- Eggs: They bind everything together, giving the cookie cups structure without making them cakey.
- Canola or vegetable oil: Adds moisture and keeps the cookie cups tender but sturdy enough to hold frosting.
- Black food coloring (optional): Adds a spooky look if you want your cookie dough to have that dark “witchy” tone.
- Unsalted butter: The frosting base—softened butter makes the buttercream smooth and creamy.
- Powdered sugar: Sweetens and thickens the frosting to pipe-perfect consistency.
- Vanilla extract: Adds warmth and depth of flavor to the buttercream.
- Salt: Balances sweetness and enhances all other flavors.
- Milk: Adjusts frosting consistency so it’s smooth enough to pipe but thick enough to hold its shape.
- Green food coloring: Creates the classic bubbling cauldron color for that Halloween vibe.
- Decorations like: round green sprinkles, Halloween sprinkles, candy eyeballs, and pretzel sticks bring fun textures and personality to your cookie cups.
Make It Your Way
One of the things I love most about the Cauldron Cookie Cups Recipe is how playful and customizable it is. Feel free to tweak the frosting color or decorations to fit any holiday or theme. I’ve had so much fun experimenting with different “potions” by changing up the frosting colors or adding edible glitter.
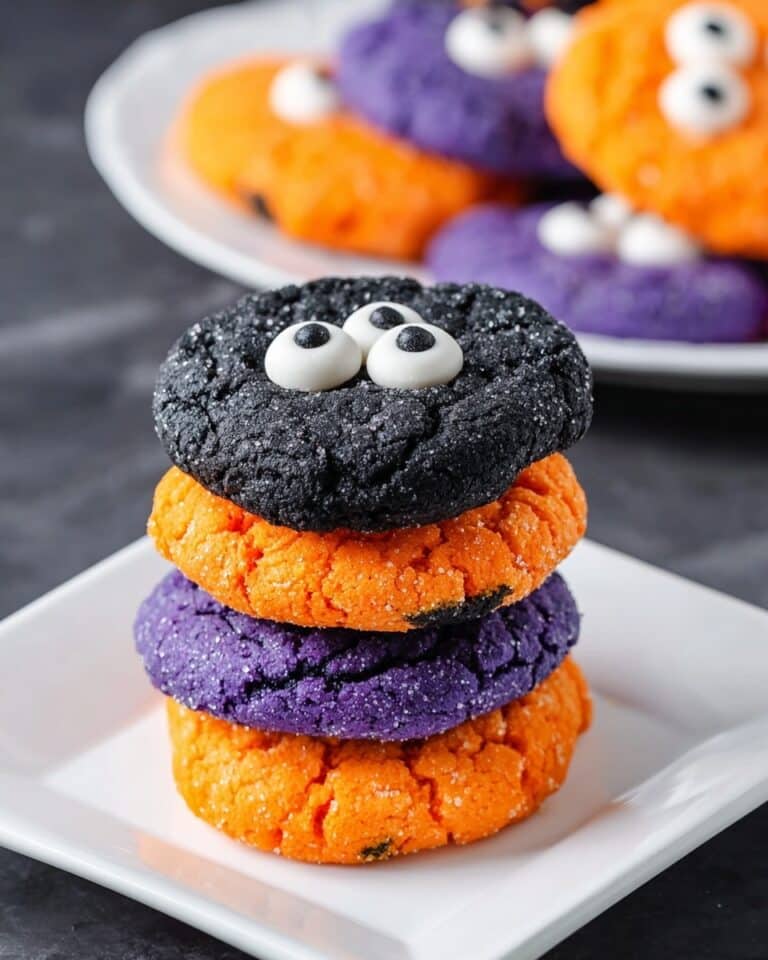
- Variation: I once swapped the green buttercream for a bright purple one using gel food coloring to make “witch’s brew” cookie cups for a birthday party—and they were a hit! Try your favorite colors or even add a splash of mint extract for a refreshing twist.
- Dietary modifications: You can use dairy-free butter and milk substitutes to make these vegan-friendly—just keep an eye on frosting consistency as it can change slightly.
- Seasonal twists: Around Christmas, I like swapping sprinkles for red and green or gold accents, turning them into festive holiday cauldron treats.
Step-by-Step: How I Make Cauldron Cookie Cups Recipe
Step 1: Prepare the Dough and Mini Muffin Pans
First things first—preheat your oven to 350°F and lightly grease three 12-count mini muffin pans. I like to use a little non-stick spray or brush the pans with melted butter. This ensures your cookie cups pop out easily later without breaking. Next, mix together the cake mix, eggs, oil, and black food coloring (if you’re using it) in a large bowl until smooth. The dough will be soft but hold together nicely.
Step 2: Shape and Bake
Use about ½ tablespoon of cookie dough for each cup—rolling it into a ball isn’t necessary; just scoop and flatten lightly with your fingers directly in the mini muffin wells. Bake these bad boys for 8-10 minutes until the edges are set but the centers still look just a tiny bit soft.
Step 3: Create the Cauldron Shape
Here’s where the magic happens! Right after taking the pans out of the oven, use the back of a 1-tablespoon measuring spoon to press down gently into each warm cookie—this creates the perfect little hollow to hold our frosting “potion.” Let them cool completely in the pan before removing. Patience here pays off to avoid cracking.
Step 4: Whip Up the Buttercream
While the cookie cups cool, get started on the buttercream frosting. Beat the softened unsalted butter until creamy, then gradually add powdered sugar, vanilla extract, and salt, continuing to beat until silky smooth. Add milk one tablespoon at a time until you reach a consistency that’s thick but pipeable. Fold in green food coloring until you hit that perfect bubbling cauldron shade.
Step 5: Pipe and Decorate
Now the fun part! Spoon your buttercream into a piping bag with a medium round tip or simply use a zip-top bag with a snipped corner. Fill each cookie cup generously, letting the frosting mound up like bubbling potion. Finish with an assortment of green sprinkles, candy eyeballs, and Halloween sprinkles. Break pretzel sticks in half and stick one into each cup as your “stir stick.” So cute, right?
Tips from My Kitchen
- Don’t overbake: The cookie cups should still be slightly soft in the center when you take them out—this keeps them tender and prevents cracking when you press the indentation.
- Press while warm: I learned that pressing the cookie cups when they’re still warm is the key to forming a clean, deep cup shape. Try not to wait for them to cool!
- Use gel coloring for frosting: Gel food coloring gives a more vibrant, intense green without watering down your frosting.
- Easy cleanup: Line your mini muffin pans with mini cupcake liners if you want to skip greasing and make cleanup a breeze—just note it changes the edges a bit.
How to Serve Cauldron Cookie Cups Recipe
Garnishes
For garnishes, I keep it fun and festive with a mix of round green sprinkles for that bubbling brew effect and little candy eyeballs scattered on top for that classic spooky vibe. Pretzel sticks break into perfect little “stir sticks” that your guests will love fiddling with before devouring. If you want to get creative, try edible glitter or tiny gummy worms for added creepiness.
Side Dishes
If you’re serving these at a party, pair them with other easy finger foods like mini sandwiches, fruit skewers, or deviled eggs. A tall glass of cold milk or a festive punch complements these sweet treats perfectly—I especially love a sparkling green limeade when serving these for a Halloween bash.
Creative Ways to Present
For a Halloween party, I’ve arranged the Cauldron Cookie Cups Recipe on a black platter sprinkled with dry ice for a smoky cauldron effect—guests are always impressed! You can also serve them in mini cauldron bowls or on tiers with other themed treats for a magical dessert display.
Make Ahead and Storage
Storing Leftovers
I usually store these cookie cups in an airtight container at room temperature—just make sure they’re fully cooled and the frosting is set to avoid mess. They keep well for 3-4 days, which is plenty of time to enjoy the magic without losing freshness.
Freezing
For longer storage, I’ve found you can freeze the undecorated cookie cups (without frosting and decorations) for up to three months. Just thaw them slowly at room temperature before frosting and decorating. This trick saves loads of time if you want to prepare ahead for a big event.
Reheating
Since these are cookie cups with frosting, reheating isn’t something I recommend. Instead, just let frozen cups thaw fully, then frost them fresh for the best texture and appearance. If you want a warm treat, try warming a cup slightly in the microwave for 5-7 seconds before adding frosting—just don’t overdo it or the cups get too soft.
FAQs
-
Can I use a different cake mix for the cookie cups?
Absolutely! While Devil’s Food gives a rich chocolate flavor perfect for a spooky vibe, you can experiment with other cake mixes like yellow or red velvet for different flavors and colors. Just keep in mind the color theme if you want to keep the “cauldron” look.
-
How do I prevent the cookie cups from cracking when making the indentation?
Great question! The key is to press the indentation immediately after baking when the cookie cups are still warm and soft. If you wait until they’re completely cool, they’ll be too hard and likely to crack or break. Use gentle, even pressure for best results.
-
Can I make the frosting ahead of time?
Yes, you can make the buttercream frosting a day ahead and store it in an airtight container in the refrigerator. Before piping, bring it back to room temperature and give it a quick stir or re-whip to restore its pipeable texture.
-
What can I substitute for pretzel sticks as stirrers?
If pretzels aren’t your thing, try thin candy canes, chocolate-dipped sticks, or even licorice strands. Just make sure whatever you use is firm enough to stand upright in the frosting.
Final Thoughts
This Cauldron Cookie Cups Recipe holds a special place in my heart—there’s something so joyful about creating edible mini “cauldrons” that instantly bring smiles and spark a little imagination. Whether you’re baking for a party, holiday, or just a fun weekend treat, these cookie cups deliver on both looks and flavor without complicated steps. I can’t wait for you to make them in your own kitchen, add your personal twist, and share the magic with friends and family. Happy baking!
Print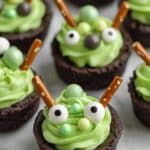
Cauldron Cookie Cups Recipe
- Prep Time: 20 minutes
- Cook Time: 10 minutes
- Total Time: 30 minutes
- Yield: 36 cookies
- Category: Dessert
- Method: Baking
- Cuisine: American
Description
These Cauldron Cookie Cups are perfect for Halloween parties, featuring dark chocolate cookie cups filled with vibrant green buttercream and decorated with spooky sprinkles and candy eyeballs. Easy to make with a devil’s food cake mix base, these festive treats are fun to bake and sure to delight kids and adults alike.
Ingredients
Cookies
- 1 (15.25 ounce) box Devil’s Food cake mix
- 2 large eggs
- 1/2 cup canola or vegetable oil
- black food coloring optional
Frosting
- 1 cup unsalted butter, softened
- 3 cups powdered sugar
- 1 teaspoon vanilla extract
- 1/2 teaspoon salt
- 1-3 tablespoons milk
- green food coloring
Decorations
- Round green sprinkles
- Halloween sprinkles
- Candy eyeballs
- Pretzel sticks
Instructions
- Preheat oven: Preheat the oven to 350 degrees Fahrenheit and lightly grease three 12-count mini muffin pans to prepare for baking.
- Mix cookie dough: In a large bowl, combine the devil’s food cake mix, eggs, canola oil, and black food coloring if using, mixing until everything is well incorporated.
- Shape cookie cups: Scoop about 1/2 tablespoon of dough into each mini muffin cup and flatten the dough slightly with your fingers to form a base.
- Bake cookies: Bake the cookie cups for 10 minutes or until the edges are set. Immediately after removing from the oven, press an indentation into each warm cookie using the back of a 1 tablespoon measuring spoon to create the cup shape. Let cool completely.
- Prepare buttercream frosting: While the cookie cups cool, beat the softened butter in a medium bowl until creamy. Gradually add powdered sugar, vanilla extract, and salt, beating until smooth. Add milk gradually until the frosting is smooth and pipeable. Mix in green food coloring to your desired color intensity.
- Fill cookie cups: Pipe the green buttercream into the cooled cookie cups, filling each one to resemble a bubbling potion.
- Decorate treats: Decorate the filled cookie cups with green sprinkles, Halloween sprinkles, and candy eyeballs. Break pretzel sticks in half and insert one into each cup to serve as a stir stick.
- Serve and enjoy: Serve the cauldron cookie cups at your Halloween gathering and enjoy these festive treats.
Notes
- Store the cookie cups in an airtight container at room temperature for 3-4 days or refrigerate for up to a week to keep them fresh.
- The undecorated cookie cups can be frozen for up to three months; frost and decorate after thawing.
- Use black food coloring sparingly to avoid a bitter taste if desired.
- Ensure cookie cups are completely cool before piping frosting to prevent melting.
- Pretzel sticks can be substituted with candy canes or chocolate sticks for a different look.
Nutrition
- Serving Size: 1 cookie
- Calories: 150 kcal
- Sugar: 15 g
- Sodium: 90 mg
- Fat: 7 g
- Saturated Fat: 4 g
- Unsaturated Fat: 2 g
- Trans Fat: 0 g
- Carbohydrates: 20 g
- Fiber: 1 g
- Protein: 1 g
- Cholesterol: 20 mg

