
Halloween Crinkle Cookies Recipe
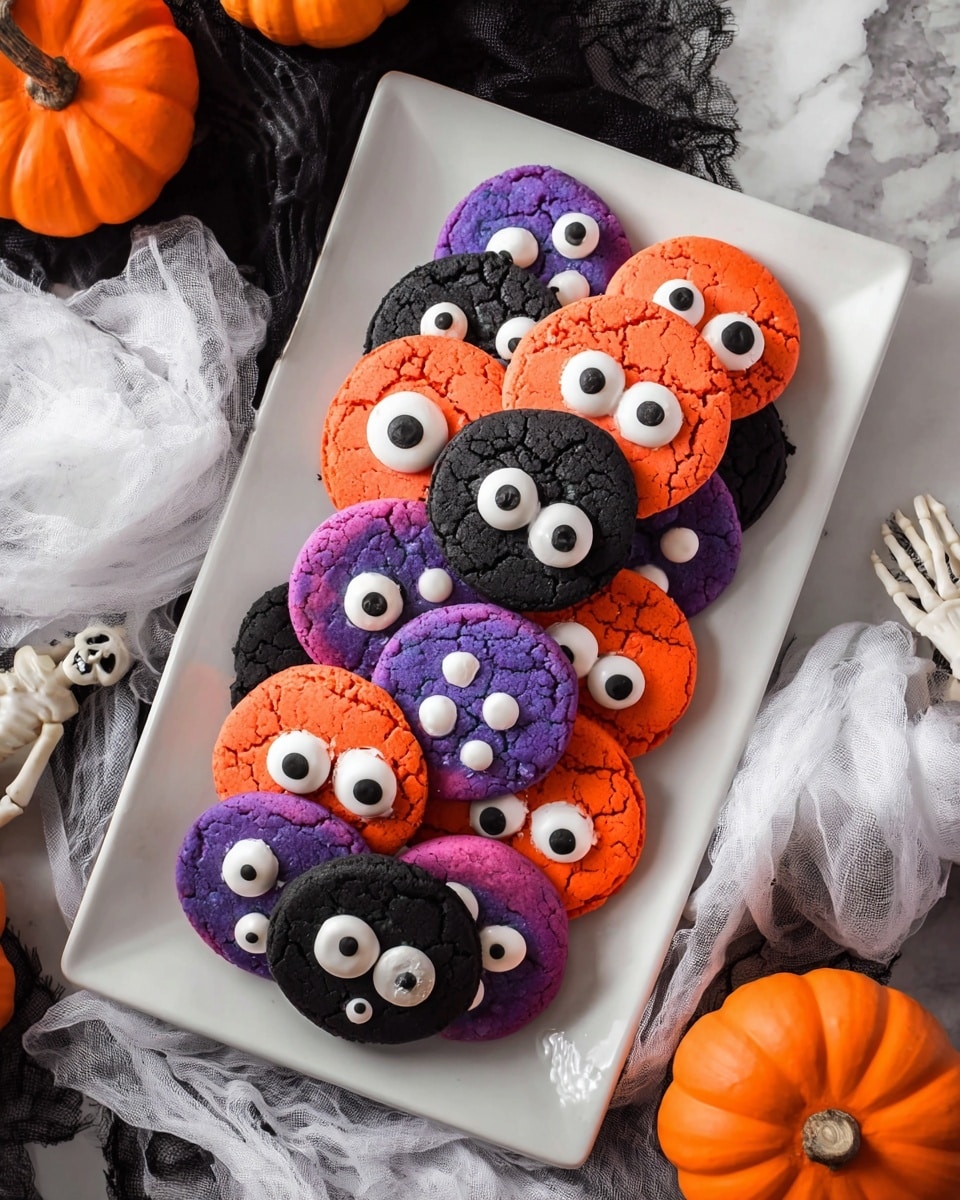
If you’re on the hunt for a festive, fun, and downright adorable treat this season, you’ve got to try my Halloween Crinkle Cookies Recipe. These little gems aren’t just cute — they’re soft, sugary, and bursting with color, perfect for a spooky celebration or a sweet everyday indulgence. Stick around because I’m sharing some of my best tips to make sure your cookies come out just right every time — these really are fan-freaking-tastic!
Why This Recipe Works
- Simple Ingredients: Using a boxed cake mix speeds up the process but still delivers that soft, tender cookie texture.
- Double Chilling: Chilling the dough twice helps the cookies hold their shape and get those perfect crinkles on top.
- Vibrant Colors: Gel food coloring gives you bold, Halloween-worthy colors without messing with the dough consistency.
- Fun Candy Eyes: Adding monster eye candies right before baking adds that extra spooky charm that makes these cookies unforgettable.

Ingredients & Why They Work
Let’s talk ingredients — they’re simple but thoughtfully chosen to create that magical Halloween crinkle look with fluffy, flavorful bites. I always go for a good vanilla cake mix as the base because it’s reliable and sweet enough without needing extra sugar.
- Vanilla cake mix: A quality box mix gives you consistent texture and flavor, so don’t skimp here.
- Vegetable oil: Keeps the dough moist and soft — plus it’s neutral in flavor.
- Icing sugar: This is not only for dusting but also creates the signature crinkle cracks when baked.
- Eggs: Bind the dough together and add richness.
- Gel food coloring: Use gels for bright colors without thinning the dough.
- Monster eye candies: These add a playful, creepy-cute finishing touch perfect for Halloween vibes.
Make It Your Way
I love playing around with this Halloween Crinkle Cookies Recipe — the colors, the candy eyes, and even the dough itself can be tweaked for extra fun. Don’t be shy to make this your own, whether you’re jazzing it up for picky kids or adding a personal twist.
- Variation: I sometimes swap out monster eyes for mini chocolate chips if I’m in a pinch, and it still looks cute and tastes amazing.
- Dietary tweaks: For a gluten-free version, try a gluten-free cake mix and see how it works for you — I’ve had good results.
- Seasonal colors: You can easily swap out the orange and black for other festive hues like green and purple to match different themes.
Step-by-Step: How I Make Halloween Crinkle Cookies Recipe
Step 1: Mix It Up with Colors and Care
First, preheat your oven to 350°F. Then, in your mixer bowl, combine the cake mix, eggs, vegetable oil, and your chosen gel food coloring. I like to split the dough into portions to add different colors — orange, black, purple — right into the same batch for a festive variety. Mix just until everything is smooth and combined. Overmixing can make them tough, so keep it gentle!
Step 2: Double Chill for Crinkle Perfection
Pop your dough into the fridge for a quick 15 minutes — this first chill firms it up and makes it easier to roll. Then, scoop out tablespoon-sized balls and roll them gently in icing sugar, making sure each ball is fully coated. After rolling, place them on a tray and into the freezer for another 10–15 minutes. This second chill is key to getting the perfect crinkle cracks when they bake!
Step 3: Press on Those Creepy Candy Eyes
Arrange your sugar-coated dough balls on a parchment-lined baking sheet. Now for the fun part — press a monster eye candy right in the center of each ball. Then, I like to chill the whole tray in the fridge for 15 minutes before baking to keep them from spreading too much. This little step keeps the eyes centered and your cookies looking their absolute best.
Step 4: Bake, Cool, and Enjoy
Bake your Halloween Crinkle Cookies for 6 to 8 minutes — watch for that telltale cracking on the surface but don’t overbake, or they’ll lose their soft chewy texture. Once done, let them cool on the baking sheet a bit before transferring to a wire rack to cool completely. I promise, the wait is worth it!
Tips from My Kitchen
- Chill Twice: I used to skip the second chill and ended up with flat cookies—don’t make that mistake!
- Use Gel Coloring: Liquid colors can make the dough too wet; gels keep the vibrancy without changing texture.
- Gentle Rolling: Rolling the dough lightly in the powdered sugar keeps the outer layer cracked and pretty.
- Watch the Bake Time: Pull them as soon as you see the cracks—oven times vary, so keep an eye on these little guys.
How to Serve Halloween Crinkle Cookies Recipe
Garnishes
I usually keep it simple with those monster eye candies for a great joke-and-a-treat effect. But if you want to go extra, stacking the cookies on a plate with a drizzle of orange or black icing can really amp up the Halloween vibe — and kids love the fun look!
Side Dishes
These cookies pair beautifully with a cold glass of milk or a warm cup of spiced apple cider, especially on those chilly October evenings. If you’re throwing a party, I love setting up a sweets table with these cookies alongside pumpkin-shaped cupcakes and candy corn for a full spooky spread.
Creative Ways to Present
One of my favorite presentation ideas is arranging them on a tiered stand surrounded by little faux spider webs. For kids’ parties, I’ve wrapped individual cookies in cellophane bags tied with orange and black ribbon — an instant party favor that’s both festive and practical!
Make Ahead and Storage
Storing Leftovers
I keep leftover Halloween Crinkle Cookies in an airtight container at room temperature. They stay soft and chewy for up to five days — if they start drying out, a slice of bread in the container works wonders for re-moisturizing!
Freezing
Freezing these cookies is a breeze. After baking and cooling, wrap them well in plastic wrap, then pop them in a freezer-safe bag. They keep well for up to 3 months. When you’re ready to enjoy, just thaw at room temperature — the candy eyes sometimes get a bit soft but taste just as good.
Reheating
If you want to enjoy them warm, I gently microwave a cookie for about 8-10 seconds. It brings back that fresh-from-the-oven feel without softening the cookie too much. Just be careful not to melt those cute candy eyes!
FAQs
-
Can I use a different cake mix flavor for the Halloween Crinkle Cookies Recipe?
Absolutely! While vanilla gives a classic base, chocolate or spice cake mixes can add unique flavor twists perfect for Halloween. Just keep an eye on the baking time as different mixes might change how quickly they bake.
-
Why do we need to chill the dough twice in this Halloween Crinkle Cookies Recipe?
The first chill firms up the dough, making it easier to handle and shape. The second chill after rolling in sugar helps solidify the sugar coating and slows spreading in the oven which creates those lovely, signature cracks.
-
Can I make these cookies without the monster eye candies?
Of course! The candies are purely decorative, so you can swap them for chocolate chips, sprinkles, or leave the cookies plain and just enjoy the crinkled sugar coating. They’ll still taste delicious!
-
How do I prevent the cookies from flattening too much?
Make sure to chill the dough properly and use gel food coloring, which won’t add extra moisture. Also, avoid overmixing the dough to keep the structure light but stable.
-
Are these cookies gluten-free?
This recipe is gluten-free only if you use a gluten-free cake mix. Regular boxed mixes typically contain gluten, so check your package if you need to avoid gluten.
Final Thoughts
Honestly, this Halloween Crinkle Cookies Recipe holds a special place in my heart because it’s so simple yet so impactful—perfect for busy days when you want party-ready treats in a snap. The vibrant colors, that sweet crackled sugar texture, and those goofy monster eyes never fail to bring smiles to my table. I can’t wait for you to try it and add your own twist; once you do, you might just find yourself reaching for this recipe every Halloween and beyond!
Print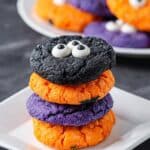
Halloween Crinkle Cookies Recipe
- Prep Time: 10 minutes
- Cook Time: 8 minutes
- Total Time: 48 minutes
- Yield: 20 servings
- Category: Dessert
- Method: Baking
- Cuisine: American
Description
Delightfully festive Halloween Crinkle Cookies with vibrant colors, soft texture, and fun monster eye candies. These easy-to-make cookies use a vanilla cake mix base, are rolled in icing sugar, and baked to a perfect crackled finish—ideal for spooky holiday celebrations.
Ingredients
Cookie Dough
- 1 box vanilla cake mix
- 1/3 cup vegetable oil
- 2 eggs
- food coloring gel in orange, black, and purple
Coating and Decoration
- 2 cups icing sugar, for rolling and dusting
- monster eye candies
Instructions
- Preheat Oven: Set your oven to 350°F (175°C) and prepare a baking sheet by lining it with parchment paper.
- Make Dough: In a mixing bowl, beat together the vanilla cake mix, vegetable oil, eggs, and desired amounts of orange, black, and purple food coloring gel until evenly combined and smooth.
- Chill Dough: Refrigerate the dough for 15 minutes to firm it up, which helps maintain shape while baking.
- Form Cookies: Scoop a tablespoon of chilled dough and roll it into a ball; then gently roll the ball in icing sugar ensuring an even coating.
- Freeze Cookies: Place the sugar-coated dough balls onto a tray and freeze for 10 to 15 minutes to further solidify their shape before baking.
- Arrange and Decorate: Transfer frozen dough balls to the parchment-lined baking sheet. Press a monster eye candy into the center of each cookie gently but firmly.
- Chill Again: Place the prepared baking sheet with cookies back into the refrigerator for 15 minutes to chill again for even baking.
- Bake: Bake cookies in the preheated oven for 8 minutes, or until the surfaces crack but the centers remain soft.
- Cool: Allow cookies to cool on the baking pan for a few minutes before transferring them to a wire rack to cool completely.
Notes
- Chill dough twice — Cold dough holds its shape better and creates the signature crackled surface.
- Use gel food coloring — Gels add vivid color without adding extra moisture that could affect texture.
- Roll dough balls gently in icing sugar to keep a nice coating without smudging colors.
- Don’t overbake — Remove cookies right when they develop cracks to keep them soft and chewy inside.
- If you want extra vivid colors, divide dough into separate bowls and color each before chilling.
Nutrition
- Serving Size: 1 cookie
- Calories: 150 kcal
- Sugar: 12 g
- Sodium: 150 mg
- Fat: 7 g
- Saturated Fat: 1 g
- Unsaturated Fat: 6 g
- Trans Fat: 0 g
- Carbohydrates: 20 g
- Fiber: 0.5 g
- Protein: 1 g
- Cholesterol: 15 mg


